Get [PRO] Pricing
Get [PRO] Pricing

Installing a wall-mount kitchen sink can be a transformative upgrade for your kitchen. Not only does it offer a sleek modern look, but it also provides numerous benefits that can enhance your overall cooking and cleaning experience. Imagine having more counter space, easier access to the sink, and a stylish focal point that adds charm to your kitchen.
The installation process may seem daunting initially, but with the proper guidance and preparation, you can achieve a professional-looking result. In this article, we will walk you through the steps of installing a wall mount kitchen sink. A proper installation is essential for a sturdy, long-lasting, and functional sink. If done correctly, you can expect less frequent maintenance and repairs. In the following sections, we will guide you through the planning and preparation stages, the necessary pre-installation steps, plumbing preparation, sink installation, and the finishing touches. Follow these steps, take your time, and proceed with installation safely.
Before diving into the installation process, assess your kitchen layout and the available wall space. Consider the flow of your kitchen and what setup would work best for you. Look for a suitable location where the sink will be both practical and visually appealing. Consider the proximity to other kitchen fixtures such as countertops, cabinets, and appliances. An essential tip to follow is the kitchen triangle layout. The kitchen work triangle optimizes your cooking workflow; sink placement is essential to this design rule.

Also, measure the available wall space carefully, ensuring that it can accommodate the size of the wall mount sink you intend to install. Remember any specific requirements, such as clearance from nearby windows or electrical outlets.
Consider the functionality you require and your personal preferences. Wall mount sinks come in various materials, such as stainless steel, porcelain, or composite materials. Each material has its unique advantages in terms of durability, maintenance, and style.
Additionally, consider the sink size in relation to your available wall space and the tasks you typically perform in the kitchen. A deeper and wider sink might be preferable if you frequently handle large pots and pans. On the other hand, if space is limited, a smaller, compact sink might be more suitable. Take your time to research and choose a wall-mount sink that best meets your needs.

Preparing your tools and parts before you begin ensures a smooth workflow and avoids interruptions during the installation. The specific tools and materials required may vary based on the sink model and your plumbing setup, but here are some common items you may need:
- Adjustable wrench
- Screwdriver
- Stud finder
- Tape measure
- Level
- Pipe cutter
- Plumber's putty
- Silicone sealant
- Sink brackets and hardware
- Plumbing pipes, connectors, and valves
- Teflon tape
Thoroughly clean the wall surface using a mild detergent and water solution. Remove any dirt, grease, or residue that may have accumulated over time. A clean wall will provide better adhesion for the sink brackets and ensure a secure installation.
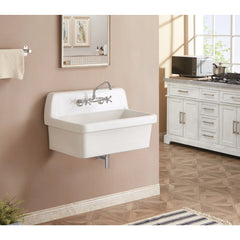
Studs are vertical wooden or metal supports within the wall structure that provide stability and support. Use a stud finder to locate the studs behind the wall surface. Once you've identified the studs, mark their positions with a pencil or masking tape. By mounting the sink brackets directly into the studs, you ensure a strong and stable foundation for your wall-mount sink. Avoid mounting the sink solely to drywall or other non-structural materials, as it may not provide sufficient support.

Start by measuring and marking the sink’s centerline on the wall, aligning it with the desired location. Use a level to ensure the centerline is straight and properly aligned with your kitchen layout.
Next, mark the locations for the plumbing connections, such as the water supply lines and drain. This step will help you avoid any issues with misaligned plumbing connections. Additionally, consider marking any additional features or accessories you plan to install, such as soap dispensers or side sprayers. These markings will guide you during the installation and ensure the proper placement of these elements.
Adjust or relocate existing plumbing lines if necessary:
Evaluate your plumbing connections and determine if any adjustments or relocations are required to align with the new sink location. If adjustments are needed, you may need to cut and reposition pipes, add extensions, or install new fittings. This step requires some plumbing knowledge and skill, so consulting a professional is recommended.
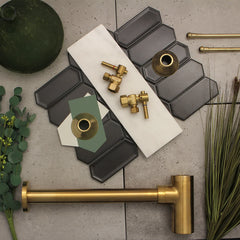
Install necessary valves, pipes, and connectors for the sink:
Install shut-off valves on the hot and cold water supply lines. Connect the appropriate pipes and connectors to the shut-off valves, ensuring a secure and leak-free connection. Consider using Teflon tape on threaded connections to create a watertight seal. This tape helps prevent leaks and ensures a reliable connection. Follow the manufacturer's instructions and local plumbing codes when installing the valves, pipes, and connectors to ensure compliance and optimal functionality.
Shutting off water supply and drain existing plumbing:
Before beginning any installation, it is advisable to flush your water supply lines, insert the water supply lines in a bucket and open both valves for 30 seconds; this will clear the lines of any debris; shut off both water supply lines before proceeding.
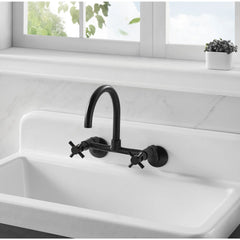
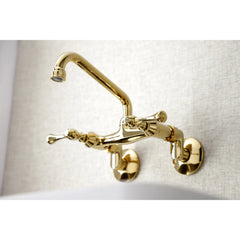
Install the faucet on the sink, and connect the necessary elbows to allow the sink to be mounted flush on the wall; install the supply lines to the elbows.
Complete the installation of your wall-mount kitchen sink by installing the sink strainer and any additional accessories you have chosen. The sink strainer prevents food particles and debris from clogging the drain. Place the strainer in the drain hole and secure it according to the manufacturer's instructions.
With the plumbing preparation completed, it's time to mount the sink brackets securely to the wall studs. Position the brackets according to the markings made during the pre-installation steps, ensuring they align with the sink’s centerline. Secure the brackets to the wall studs using a drill and screws appropriate for your wall type. Ensure the brackets are level and tightly fastened to provide a stable foundation for the sink.
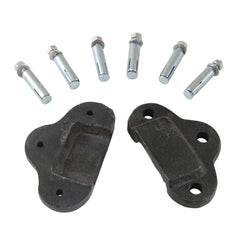
It's time to secure the sink to the brackets and ensure proper alignment. Double-check that the sink is level and centered according to the markings made during the pre-installation steps. Using the provided hardware or clamps, secure the sink to the brackets. Tighten the screws or clamps evenly to ensure a secure fit.
Connect the hot and cold water supply lines to the corresponding shut-off valves. Use the appropriate connectors and ensure a tight connection.
Connect the sink drain to the existing plumbing drain. Apply the plumber's putty or silicone sealant to create a watertight seal around the drain hole. Secure the drain assembly in place, following the manufacturer's instructions.
Turn on the water supply and check all the connections, including the shut-off valves, supply lines, and drain. If you notice any leaks, tighten the connections or apply additional sealant as needed. It's important to address any leaks promptly to prevent water damage and ensure the proper functioning of your wall-mount kitchen sink.
Use a waterproof silicone sealant and apply it along the seam where the sink meets the countertop or wall surface. Smooth out the sealant using a caulk smoothing tool or your finger, ensuring a neat and uniform finish. Follow the manufacturer's instructions for drying time and any additional steps required for optimal sealant performance.
Once the sealant is dry and all the accessories are installed, cleaning up the work area and testing the sink for functionality is time. Remove any debris, tools, or materials from the installation process. Wipe down the sink and surrounding surfaces to ensure they are clean and residue-free. Turn on the water supply and test the functionality of the sink. Run both hot and cold water, and check for proper water flow and drainage. Test the shut-off valves to ensure they are functioning correctly. Look for any signs of leaks or issues and address them promptly. Additionally, check the alignment of the sink, ensuring it sits evenly and securely on the brackets. Take a moment to appreciate your newly installed wall-mount kitchen sink and the transformation it has brought to your kitchen.
Installing a wall-mount kitchen sink can be a rewarding DIY project. If you’re unsure about installing by yourself, ask a friend for help or consult a plumbing professional. Each step contributes to a successful installation, from planning and preparation to plumbing preparation, sink installation, and the finishing touches. Remember to prioritize proper alignment, secure mounting, and thorough testing for leaks to ensure a reliable and functional sink.
Now that you have the knowledge and guidance to install a wall-mount kitchen sink, it's time to embark on this exciting project. Enjoy the benefits of a beautiful and efficient sink that will enhance your daily kitchen activities.
Happy installing!